Better late than never as they said. It took a little over a year to complete this level. I wished it didn’t take so long to do so. Every man has to deal with things in their lives whether it be: family, livelihood, drama, problems mental, physical, & situational. But there are a few things no matter what someone may say they can never take them any from me. Knowledge. I learned a lot from doing this level maybe more than what I was supposed to do, but it’s OK. I achieve what I originally set out to do. Learn more about Unreal. Even though when things went from UT3 and turned towards UDK. I adjusted and kept going with the flow. I’m a better entry game designer because of it. Flexibility is important in most things in life and this is no exception. Drive. I pushed myself to do this even though my life was shaken upside down more times than I would’ve like. I pushed past my sorrows, my procrastinations, and troubles; and pressed onwards. When most people would’ve lost hope, will, and the motivation, I still walked. I know what I want. I know what my dreams are. And I know what I need to do to get there. I want to thank people who know me, supported me, and people that didn’t. Friends, family, colleagues, “Nah Sayers”, haters, skeptics, and people who really didn’t care, but offered help anyway. Thank you! As much positive energy I was given, more negative energy was directed my way as well. People, who tried to get in my way, hold me back; make me wait, and those who didn’t have my best interests at heart. Thank you. I needed those obstacles to give me a challenge and learn a VERY valuable lesson. Strife brings success out of the truly determined ones. Thank you for reading this. And I hope you follow my future endeavors while I keep moving forward and learning new things. To pull towards the DREAM! I’ll keep learning and keep clawing towards that brass ring. As another old saying goes, “The only thing holding you back is yourself!” I want to achieve way past my potential. Keep learning & getting better.
Thank you for reading this all the way through. This meant a lot to me. I hope you see something else from me soon.
Thursday, May 5, 2011
Blog 20 – Lighting
This post is about one of the finishing touches on this level, Lighting. Lighting is very important it allows the player to see, build suspense, mystery, lead the player, and among other things. I watched several tutorials, read forums, asked on forums, colleagues, and weeks on trial & error. For this post I used lighting from a static meshes’ emissive (alpha) called Emissive Lighting, point lighting, & light mass. I am relatively new at lighting, so bear with me, please.
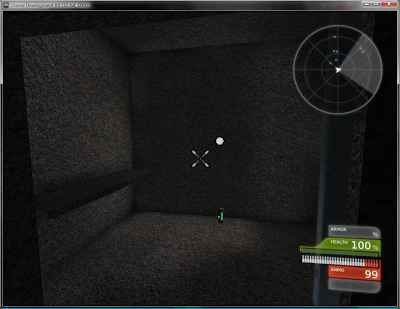
Here is a shot of a small box shaped room lit. I used the static mesh of my walled light fixture’s alpha to emit light which is called “Emissive Light”. It looks good in a small room. Most side & small rooms in this level has Emissive Light in them.
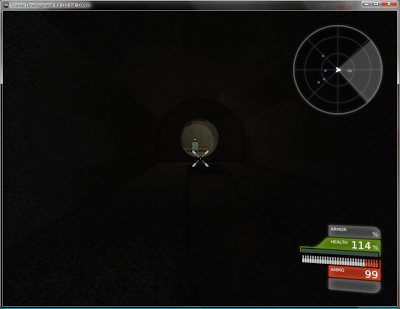
Here’s a shot of a cylindrical tunnel with Emissive Lighting. And there is something weird about how it lights. I was told that lighting in cylindrical shapes did weird things.
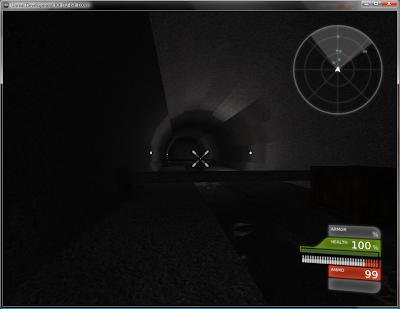
Here is a screenshot the player coming up on a room that has light. I like this way of lighting it sort of draws the player to it. It seems like it’s leading the player to their next destination.
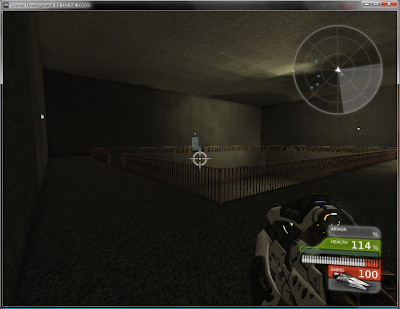
Here’s a shot of a major room in the level. It leads to three different areas on the level. It’s a large area with a large light radius using a point light in front of a walled light fixture.
Here’s a shot of a cylindrical tunnel with one point light in the dark. I like that there is little light, keeps the suspense up because at this point the player already experienced a couple enemies, so they should be on edge.
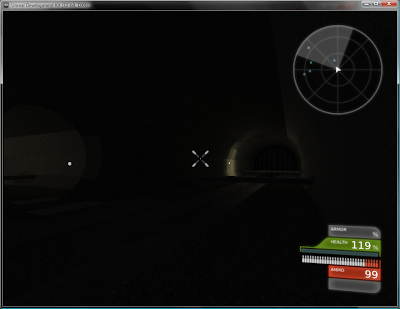
Here’s a shot of a long cylindrical tunnel with several point light throughout it.
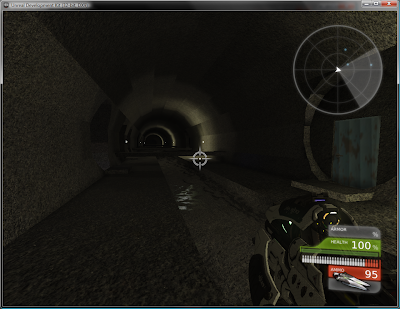
Here’s a shot of a room after the player goes down the sewer gate that goes from the third floor to the second floor.
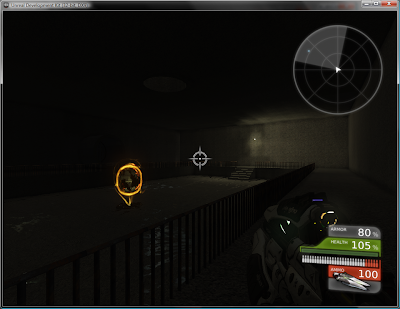
Here’s a shot of a cylindrical tunnel. This one is very dark with no lights in it. The only light the player with have is the light behind & in front of the player. The player may need to be careful. I personally think fighting the dark is a real challenge.
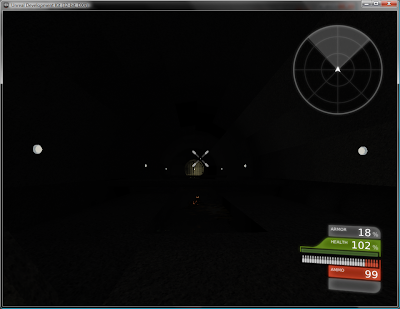
Here’s a shot of a cylindrical tunnel with two point lights are on each side of the tunnel.
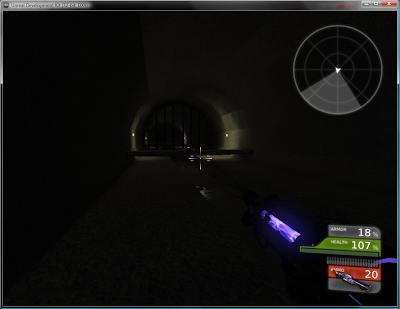
Here’s another shot of a cylindrical tunnel with very limited lighting. There’s a bright, shining light coming from the next upcoming corridor. Building anticipation.
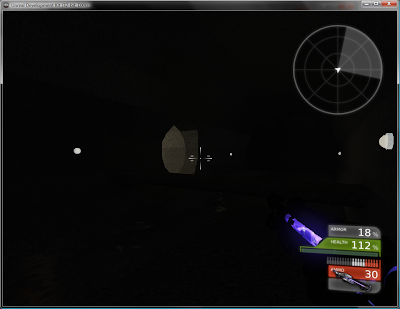
Here’s a shot of a one of the final rooms in the level. I think this level is well lit, so the player can see everything in the room to navigate it.
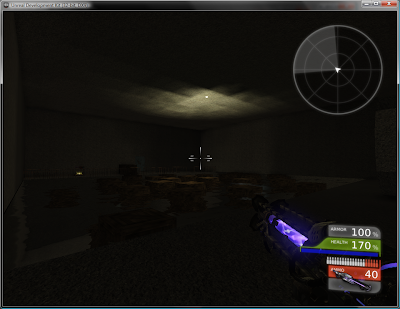
Here’s a shot of the final room of the level well lit, so a direct firefight is possible.
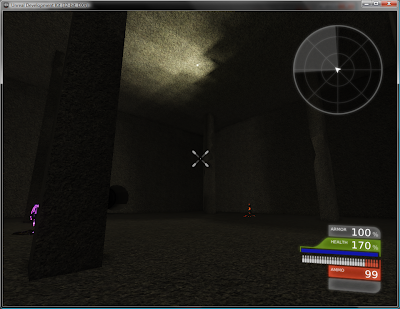
All the major stuff is done with the level is done. I just a few minor fixes & fixing the lighting in the level. Any advice or help is welcomed and appreciated. Thank you.
Here is a shot of a small box shaped room lit. I used the static mesh of my walled light fixture’s alpha to emit light which is called “Emissive Light”. It looks good in a small room. Most side & small rooms in this level has Emissive Light in them.

Here’s a shot of a cylindrical tunnel with Emissive Lighting. And there is something weird about how it lights. I was told that lighting in cylindrical shapes did weird things.

Here is a screenshot the player coming up on a room that has light. I like this way of lighting it sort of draws the player to it. It seems like it’s leading the player to their next destination.

Here’s a shot of a major room in the level. It leads to three different areas on the level. It’s a large area with a large light radius using a point light in front of a walled light fixture.

Here’s a shot of a cylindrical tunnel with one point light in the dark. I like that there is little light, keeps the suspense up because at this point the player already experienced a couple enemies, so they should be on edge.

Here’s a shot of a long cylindrical tunnel with several point light throughout it.

Here’s a shot of a room after the player goes down the sewer gate that goes from the third floor to the second floor.

Here’s a shot of a cylindrical tunnel. This one is very dark with no lights in it. The only light the player with have is the light behind & in front of the player. The player may need to be careful. I personally think fighting the dark is a real challenge.

Here’s a shot of a cylindrical tunnel with two point lights are on each side of the tunnel.

Here’s another shot of a cylindrical tunnel with very limited lighting. There’s a bright, shining light coming from the next upcoming corridor. Building anticipation.

Here’s a shot of a one of the final rooms in the level. I think this level is well lit, so the player can see everything in the room to navigate it.

Here’s a shot of the final room of the level well lit, so a direct firefight is possible.

All the major stuff is done with the level is done. I just a few minor fixes & fixing the lighting in the level. Any advice or help is welcomed and appreciated. Thank you.
Wednesday, April 13, 2011
Blog 19 – Touch Ups
This post is more about an update of the level. Fixed quite of few things like gaps in doorways, spots where the player can get stuck behind the doors when they open, the texture and texturing UV’s, pillars for the last room, fixed the safety crates so the player can get out the water easier, trigger for the end of the level, trigger info for the first part of the level, and destructive able support pillars.
Here is a shot of the player triggering a trigger that gives them info. Telling them their objective and how to get pass locked doors.

Here’s a shot of the player triggering a second trigger that gives them a warning that they are not alone in this sewer. This gives the player a heads up about enemies lying in wait further in the level.

Here is a screenshot of the new texture in the level. Looks better than the previous texture I had in this level. Stone that has aged and damaged from time and moisture in the air.

Here’s a shot of the player triggering a third trigger that gives them more information about keys and doors. Also, telling them to keep an eye of for toolboxes which are the resting place for all the keys in the level.

Here’s a shot of the player triggering a fourth trigger that tells them how to pick up keys. What key on the keyboard to press (E) and in what position to be in to execute the command.

Here’s a shot of a door. All doors in the levels gaps and openings between doors and doorways have been fixed. There’s no more peeking through gaps to see what’s on the other side.

Here’s a shot of the player being pushed behind the door when it’s opened from the inside. There was a problem that when that incident occurred the player would get stuck between the door and the wall. The player would be stuck there for awhile and eventually would die. This was a problem that needed to be fixed. There’s no honor in the player dying that way is there?

Here’s a shot for the crate and rail contraption. This contraption allows the player to recover from falling in the water. Before this repair it was quite a pain to get out of the water, but not anymore. It’s easy as pie, now.

Here’s a shot of the final room. There now four support pillars. Theses fill up the empty space and provide cover for a proper firefight, but no one should get too comfortable sitting behind these, their destructive able.

Here’s one of the final things the player will see in this level. When the player reaches the exit sewer pipe, they will trigger a text telling them that they’ve completed the level and a cool sound effect plays. They are then done. They could just exit the game and go about checking out my other levels.

Here’s a shot of a destructive able support pillar damaged. I modeled a support beam to be in the middle to hold the destructive able support pillars up. Without they would fall over when the bottom of the pillar got taken out and the rest of the pillar cannot be damaged any further. Believe me I’ve tested with it.

Next Post, I’ll start lighting this level.
Here is a shot of the player triggering a trigger that gives them info. Telling them their objective and how to get pass locked doors.

Here’s a shot of the player triggering a second trigger that gives them a warning that they are not alone in this sewer. This gives the player a heads up about enemies lying in wait further in the level.

Here is a screenshot of the new texture in the level. Looks better than the previous texture I had in this level. Stone that has aged and damaged from time and moisture in the air.

Here’s a shot of the player triggering a third trigger that gives them more information about keys and doors. Also, telling them to keep an eye of for toolboxes which are the resting place for all the keys in the level.

Here’s a shot of the player triggering a fourth trigger that tells them how to pick up keys. What key on the keyboard to press (E) and in what position to be in to execute the command.

Here’s a shot of a door. All doors in the levels gaps and openings between doors and doorways have been fixed. There’s no more peeking through gaps to see what’s on the other side.

Here’s a shot of the player being pushed behind the door when it’s opened from the inside. There was a problem that when that incident occurred the player would get stuck between the door and the wall. The player would be stuck there for awhile and eventually would die. This was a problem that needed to be fixed. There’s no honor in the player dying that way is there?

Here’s a shot for the crate and rail contraption. This contraption allows the player to recover from falling in the water. Before this repair it was quite a pain to get out of the water, but not anymore. It’s easy as pie, now.

Here’s a shot of the final room. There now four support pillars. Theses fill up the empty space and provide cover for a proper firefight, but no one should get too comfortable sitting behind these, their destructive able.

Here’s one of the final things the player will see in this level. When the player reaches the exit sewer pipe, they will trigger a text telling them that they’ve completed the level and a cool sound effect plays. They are then done. They could just exit the game and go about checking out my other levels.

Here’s a shot of a destructive able support pillar damaged. I modeled a support beam to be in the middle to hold the destructive able support pillars up. Without they would fall over when the bottom of the pillar got taken out and the rest of the pillar cannot be damaged any further. Believe me I’ve tested with it.

Next Post, I’ll start lighting this level.
Thursday, April 7, 2011
Blog 18 – Checkpoints
Here’s a post about another important part of my level that I’ve always wanted to put in my levels, Checkpoints! The beginning of the level starts off on the third floor. The player will have to be really good and complete the level without getting killed or if the player would die he or she would have to start all the way over from the very beginning. All the keys would still be in their possession, but it’s a large level, so the player will have to go through the level all over again which might be annoying. But with the checkpoints the player would have to make it to a certain point in the level and if they died, they would keep all their keys, and respawn at a location near the last checkpoint marker they hit before they perished.
First, I put a PlayerStart at a spot in the level. Then went into its properties disable it or uncheck “Enabled” and “PrimaryStart”, so the player doesn’t accident spawn at any place they have not been before. Use a TriggerVolume that needs to be touched only one time. When it’s touched, I have 2 toggles connected. One toggle to disable the past PlayerStart and enable the newly reached PlayerStart.
Here is a shot of player going through the door that requires the first key of the level. Checkpoint # pops up to tell the player that they’ve reached a checkpoint. The respawn PlayerStart for the checkpoint is to the right.

Here’s a shot second checkpoint in the level. After the player opens the door that requires the second key that leads to the third key. The player will trigger the next checkpoint. The respawn PlayerStart for this checkpoint is doing a 180 degrees turn and to the right outside the door at the end of the hall.

Here is a screenshot of the third checkpoint in the level. After the player acquires the fifth key and opens the sewer gate on the third floor that leads to the second floor. The player falls and triggers the checkpoint. The respawn PlayerStart for this checkpoint is at the end of the fall next to the portal.

Here is a screenshot of the fourth and final checkpoint in the level. This checkpoint can be triggered only after the player goes through the sewer gate towards the end of the level after acquiring the seventh and final key. The respawn PlayerStart for this checkpoint is a small distance backwards away from the sewer gate.

I want to thank MrMikertron for his video tutorial on checkpoints.
Next Post, I’ll do some work on new textures and the final room for this level.
First, I put a PlayerStart at a spot in the level. Then went into its properties disable it or uncheck “Enabled” and “PrimaryStart”, so the player doesn’t accident spawn at any place they have not been before. Use a TriggerVolume that needs to be touched only one time. When it’s touched, I have 2 toggles connected. One toggle to disable the past PlayerStart and enable the newly reached PlayerStart.
Here is a shot of player going through the door that requires the first key of the level. Checkpoint # pops up to tell the player that they’ve reached a checkpoint. The respawn PlayerStart for the checkpoint is to the right.

Here’s a shot second checkpoint in the level. After the player opens the door that requires the second key that leads to the third key. The player will trigger the next checkpoint. The respawn PlayerStart for this checkpoint is doing a 180 degrees turn and to the right outside the door at the end of the hall.

Here is a screenshot of the third checkpoint in the level. After the player acquires the fifth key and opens the sewer gate on the third floor that leads to the second floor. The player falls and triggers the checkpoint. The respawn PlayerStart for this checkpoint is at the end of the fall next to the portal.

Here is a screenshot of the fourth and final checkpoint in the level. This checkpoint can be triggered only after the player goes through the sewer gate towards the end of the level after acquiring the seventh and final key. The respawn PlayerStart for this checkpoint is a small distance backwards away from the sewer gate.

I want to thank MrMikertron for his video tutorial on checkpoints.
Next Post, I’ll do some work on new textures and the final room for this level.
Thursday, March 31, 2011
Blog 17 – Enemy Placement
Here’s a post about another important part of my level that I’ve always wanted to put in them, enemies, drones, or bots. Giving the player actual physical resistance to stand in their way other than the environment. Obstacles that can stop the player through death! There are 13 enemies in this level, 10 of them throughout the level and 3 more in the last room where the exit is.
Here is a shot of a PlayerStart that the enemies spawn from through Kismet. (It’s on the left hand side of this picture)

Here’s a shot of the same area, but during gameplay. They will be shooting at me & hunting me down when I run. For most of this post I will be taking shots from the editor windows.

Here is the Kismet set up for spawning bots. Most of the bots spawn when the level starts up. The Level Loaded is connected to the Actor Factory where the AI, name, inventory, and etc. The PlayerStarts are the point where the bots spawn into the level when it is loaded.

Most of the enemies are nothing special that have the default inventory or maybe a different weapon to give the player a better fight. I placed bots to have UT Powers like Berserk and Damage. But with enough play testing it became apparent that these power-ups only last for a brief period of time. So, when the player encountered these special enemies they were nothing special. I came up with a solution on my own. I added “TriggerVolumes” to the level and if the player stepped within the “TriggerVolume” box the enemies will spawn and will have all its power-ups right then and there.

Using the “TriggerVolumes” allowed me to spawn powerful adversaries to give the player the idea that there must be something of value where it’s guarding. Like weapons, armor, and even keys.

I want to thank chrishm7 for his tutorial on spawning bots through level loading.
Next Post, I’ll do some work on placing checkpoints in the level.
Here is a shot of a PlayerStart that the enemies spawn from through Kismet. (It’s on the left hand side of this picture)

Here’s a shot of the same area, but during gameplay. They will be shooting at me & hunting me down when I run. For most of this post I will be taking shots from the editor windows.

Here is the Kismet set up for spawning bots. Most of the bots spawn when the level starts up. The Level Loaded is connected to the Actor Factory where the AI, name, inventory, and etc. The PlayerStarts are the point where the bots spawn into the level when it is loaded.

Most of the enemies are nothing special that have the default inventory or maybe a different weapon to give the player a better fight. I placed bots to have UT Powers like Berserk and Damage. But with enough play testing it became apparent that these power-ups only last for a brief period of time. So, when the player encountered these special enemies they were nothing special. I came up with a solution on my own. I added “TriggerVolumes” to the level and if the player stepped within the “TriggerVolume” box the enemies will spawn and will have all its power-ups right then and there.

Using the “TriggerVolumes” allowed me to spawn powerful adversaries to give the player the idea that there must be something of value where it’s guarding. Like weapons, armor, and even keys.

I want to thank chrishm7 for his tutorial on spawning bots through level loading.
Next Post, I’ll do some work on placing checkpoints in the level.
Tuesday, March 22, 2011
Blog 16 – Items and Weapons Pick-ups
Here’s a post about another important part of my level, Items; it being weapons, health, ammo, and armor. Pick-ups give the player something to look forward to while progressing throughout the level. Items offer help, power, replenishing of supplies, and etc.
Here is a Health Vial. The smallest health the player can get. If the player health is at 100% and picks it up, it’ll boost the health maximum by 5 points. There are 9 of these hidden in the level. The player will have to search for them.

This is ammo for the Shock Rifle Weapon. The replenishing of the ammo won’t be applied until you first acquire the weapon and then pick up the ammo. The player can always go back to grab the ammo after acquiring the corresponding weapon. There are 4 of these in this level.

Here is a Health Kit. This restores 25 points of the players lost health. Unlike the Health Vials, they will not increase the player’s maximum health when they are at 100%, so the player will have to pick these up more strategically. There are 2 of these in this level.

Here’s a power-up pick up. This one is called UT Damage. As the name suggest, it allows whomever that picks it up weapons do more a lot more damage for brief period of time. There are 2 of these in this level.

Here’s one of the first weapons that the player can pick up: The Link Gun. The white Link Gun offers a faster fire rate and probably more powerful in contrast to the default black Link Gun the player starts off with. Yes, one does get the white Link Gun after killing a player, but only if they have it equipped when you kill them. Having a white Link Gun lying around helps players who have died and need a weapon with more fire power. There is only1 Link Gun weapon pick up spot in this level.

This is ammo for the Rocket Launcher Weapon. The replenishing of the ammo won’t be applied until you first acquire the weapon and then pick up the ammo. The player can always go back to grab the ammo after acquiring the weapon like all the other ammo pickups. There are 4 of these in this level.

Here’s one of the first armor that the player can pick up: Thigh Pads. Thigh Pads offers 30% of protection from damage (might not protect from fall, splash, or explosion damage). Once armor is depleted damage will be deducted from as normal. There is only1Thigh Pads armor pick up spot in this level.

Here’s another armor to provide protection: Base Armor. Base Armor offers 50% of protection from damage. There is only1 Base Armor pick up spot in this level.

Here’s a power-up pick up. This one is called Berserk. This power-up allows the player fire rate increase dramatically for a brief period of time. This allows for fast kills, but be cautious because this also drains ammo considerably. There are 2 of these in this level.

Here’s the second available weapon for pick-up: The Shock Rifle (one of my favorites). This weapon has a combo with the Right Mouse button that launches an energy ball and then shooting the energy ball with a lightning bolt to cause major area damage. There is only1 Shock Rifle weapon pick up spot in this level.

Here’s a very important health item: Super Health (A.K.A. “Big O’ Keg of Health”). This health pickup increases the player’s health by 100 points (MAX health 199). There is only1 Super Health pick up spot in this level.

Here is a very important armor pick-up: The Shield Belt. The armor offers 100% of protection from damage. There is only1 Shield Belt armor pick up spot in this level.

Here’s the most powerful weapon in this level and last available weapon to pick-up, the Rocket Launcher. This weapon has a couple of functions like spiraling rockets or grenades both of these features can be used with 2 or 3 rockets. This is a very versatile and destructive weapon. There is only1 Rocket Launcher weapon pick up spot in this level.

This room is before the boss battle of this level. This room contains 1 of each: Shock Rifle ammo, Rocket Launcher ammo, Link Gun ammo (only 1 in this level), and a Health Kit. This is the room is to replenish the player health and ammo before the fight. If the player needs more then he or she should go back throughout the level and collect items from the previous rooms. All the items reappear after a certain amount of time.

This room is where the boss battle is held which contains 1 of each UT Damage and Berserk power-ups. If one person collects both of them at the same time they will get the combination power-up: The Juggernaut! With combines both of these power-ups effects making the one who is the Juggernaut a killing machine.

Next Post, I’ll do some bots placing in the level.
Here is a Health Vial. The smallest health the player can get. If the player health is at 100% and picks it up, it’ll boost the health maximum by 5 points. There are 9 of these hidden in the level. The player will have to search for them.

This is ammo for the Shock Rifle Weapon. The replenishing of the ammo won’t be applied until you first acquire the weapon and then pick up the ammo. The player can always go back to grab the ammo after acquiring the corresponding weapon. There are 4 of these in this level.

Here is a Health Kit. This restores 25 points of the players lost health. Unlike the Health Vials, they will not increase the player’s maximum health when they are at 100%, so the player will have to pick these up more strategically. There are 2 of these in this level.

Here’s a power-up pick up. This one is called UT Damage. As the name suggest, it allows whomever that picks it up weapons do more a lot more damage for brief period of time. There are 2 of these in this level.

Here’s one of the first weapons that the player can pick up: The Link Gun. The white Link Gun offers a faster fire rate and probably more powerful in contrast to the default black Link Gun the player starts off with. Yes, one does get the white Link Gun after killing a player, but only if they have it equipped when you kill them. Having a white Link Gun lying around helps players who have died and need a weapon with more fire power. There is only1 Link Gun weapon pick up spot in this level.

This is ammo for the Rocket Launcher Weapon. The replenishing of the ammo won’t be applied until you first acquire the weapon and then pick up the ammo. The player can always go back to grab the ammo after acquiring the weapon like all the other ammo pickups. There are 4 of these in this level.

Here’s one of the first armor that the player can pick up: Thigh Pads. Thigh Pads offers 30% of protection from damage (might not protect from fall, splash, or explosion damage). Once armor is depleted damage will be deducted from as normal. There is only1Thigh Pads armor pick up spot in this level.

Here’s another armor to provide protection: Base Armor. Base Armor offers 50% of protection from damage. There is only1 Base Armor pick up spot in this level.

Here’s a power-up pick up. This one is called Berserk. This power-up allows the player fire rate increase dramatically for a brief period of time. This allows for fast kills, but be cautious because this also drains ammo considerably. There are 2 of these in this level.

Here’s the second available weapon for pick-up: The Shock Rifle (one of my favorites). This weapon has a combo with the Right Mouse button that launches an energy ball and then shooting the energy ball with a lightning bolt to cause major area damage. There is only1 Shock Rifle weapon pick up spot in this level.

Here’s a very important health item: Super Health (A.K.A. “Big O’ Keg of Health”). This health pickup increases the player’s health by 100 points (MAX health 199). There is only1 Super Health pick up spot in this level.

Here is a very important armor pick-up: The Shield Belt. The armor offers 100% of protection from damage. There is only1 Shield Belt armor pick up spot in this level.

Here’s the most powerful weapon in this level and last available weapon to pick-up, the Rocket Launcher. This weapon has a couple of functions like spiraling rockets or grenades both of these features can be used with 2 or 3 rockets. This is a very versatile and destructive weapon. There is only1 Rocket Launcher weapon pick up spot in this level.

This room is before the boss battle of this level. This room contains 1 of each: Shock Rifle ammo, Rocket Launcher ammo, Link Gun ammo (only 1 in this level), and a Health Kit. This is the room is to replenish the player health and ammo before the fight. If the player needs more then he or she should go back throughout the level and collect items from the previous rooms. All the items reappear after a certain amount of time.

This room is where the boss battle is held which contains 1 of each UT Damage and Berserk power-ups. If one person collects both of them at the same time they will get the combination power-up: The Juggernaut! With combines both of these power-ups effects making the one who is the Juggernaut a killing machine.

Next Post, I’ll do some bots placing in the level.
Monday, January 31, 2011
Blog 15 – Keys and Doors
Here’s a post about another important new piece of gameplay for my level that I’ve always wanted to learn how to do, Keys and Locked Doors. Blocking off paths forces the player to complete a certain goal and/or navigate through the level to find something in order to progress.
Here is the new 3D model, a Toolbox. I wanted to create a new model for the players to keep an eye out for that might hold something important.

I’ve always wanted locked doors and keys in my level. Here is whole Kismet scripting I’ve been working on. There is still a little more when you scroll down. I combined the Hourences door tutorial and the UDK forum key and door tutorial.

Here’s a door in the level, but it’s locked and won’t open. A text appears and tells you that a key is required for this door to open, which number of key it is, and gives a slight indication of what’s behind the door or what it lead to.

Here’s one of the keys in the level which is a purple particle effect. I toke and existing particle effect and just changed the color of it. The player should take notice to the color and that it will be different from upcoming ones.

Here’s what the particle effect will look like if the player collects it. It changes form to let the player know that they picked it up and can now open doors that’s to the corresponding keys.

If the player goes back to the door that was locked with the correct key it opens and the player can proceed.

There are a total of 7 different color particle effects. Here’s a light blue one.

Here’s a yellow colored particle effect.

Special thanks to the Ayalaskin for his insight on the UDK forums with the helpful tutorial.
Next Post, I’ll do some level weapons and item placement in the level.
Here is the new 3D model, a Toolbox. I wanted to create a new model for the players to keep an eye out for that might hold something important.

I’ve always wanted locked doors and keys in my level. Here is whole Kismet scripting I’ve been working on. There is still a little more when you scroll down. I combined the Hourences door tutorial and the UDK forum key and door tutorial.

Here’s a door in the level, but it’s locked and won’t open. A text appears and tells you that a key is required for this door to open, which number of key it is, and gives a slight indication of what’s behind the door or what it lead to.

Here’s one of the keys in the level which is a purple particle effect. I toke and existing particle effect and just changed the color of it. The player should take notice to the color and that it will be different from upcoming ones.

Here’s what the particle effect will look like if the player collects it. It changes form to let the player know that they picked it up and can now open doors that’s to the corresponding keys.

If the player goes back to the door that was locked with the correct key it opens and the player can proceed.

There are a total of 7 different color particle effects. Here’s a light blue one.

Here’s a yellow colored particle effect.

Special thanks to the Ayalaskin for his insight on the UDK forums with the helpful tutorial.
Next Post, I’ll do some level weapons and item placement in the level.
Subscribe to:
Comments (Atom)
